在实际案例的操作过程中,我们可能会遇到“Android如何实现点赞加一的功能效果”这样的问题,那么我们该如何处理和解决这样的情况呢?这篇小编就给大家总结了一些方法,具有一定的借鉴价值,希望对大家有所帮助,接下来就让小编带领大家一起了解看看吧。
前言
点赞这个动作不得不说在社交、短视频等app中实在是太常见了,当用户手指按下去的那一刻,给用户一个好的反馈效果也是非常重要的,这样用户点起赞来才会有一种强烈的我点了赞的效果,那么今天我们就用flutter实现一个掘金app上的点赞效果。
首先我们看下掘金app的点赞组成部分,有一个小手,点赞数字、点赞气泡效果,还有一个震动反馈,接下来我们一步一步实现。
知识点:绘制、动画、震动反馈
绘制小手
这里我们使用flutter的icon图标中的点赞小手,icons图标库为我们提供了很多app常见的小图标,如果使用苹果苹果风格的小图标可以使用cupertino_icons: ^1.0.2插件,图标并不是图片,本质上和emoji图标一样,可以添加到文本中使用,所以图标才可以设置不同的颜色属性,对比使用png格式图标可以节省不少的内存。

接下来我们就将这两个图标绘制出来,首先我们从上图可以看到真正的图标数据其实是icondata类,里面有一个codepoint属性可以获取到unicode统一码,通过string.fromcharcode(int charcode)可以返回一个代码单元,在text文本中支持显示。
class icondata{
/// the unicode code point at which this icon is stored in the icon font.
/// 获取此图标的unicode代码点
final int codepoint;
}

class string{
/// 如果[charcode]可以用一个utf-16编码单元表示,则新的字符串包含一个代码单元
external factory string.fromcharcode(int charcode);
}
接下来我们就可以把图标以绘制文本的形式绘制出来了
关键代码:
 // 赞图标
  final icon = icons.thumb_up_alt_outlined;
// 通过textpainter可以获取图标的尺寸
  textpainter textpainter = textpainter(
      text: textspan(
          text: string.fromcharcode(icon.codepoint),
          style: textstyle(
              fontsize: 30,
              fontfamily: icon.fontfamily,// 字体形象家族,这个字段一定要设置,不然显示不出来
              color: colors.black)),
      textalign: textalign.center,
      textdirection: textdirection.ltr);
  textpainter.layout(); // 进行布局
  size size2 = textpainter.size; // 尺寸必须在布局后获取
  //将图标偏移到画布中央
  textpainter.paint(canvas, offset(-size2.width / 2, -size2.height / 2));
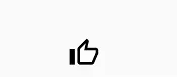
通过上方代码我们就实现了将图标绘制到画板当中
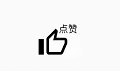
接下来继续绘制点赞数量
代码:
textpainter textpainter2 = textpainter(
    text: textspan(
        text: "点赞",// 点赞数量
        style: textstyle(
            fontsize: 9, fontweight: fontweight.w500, color: colors.black)),
    textalign: textalign.center,
    textdirection: textdirection.ltr);
textpainter2.layout(); // 进行布局
// 向右上进行偏移在小手上面
textpainter2.paint(canvas, offset(size.width / 9, -size.height / 2 + 5));
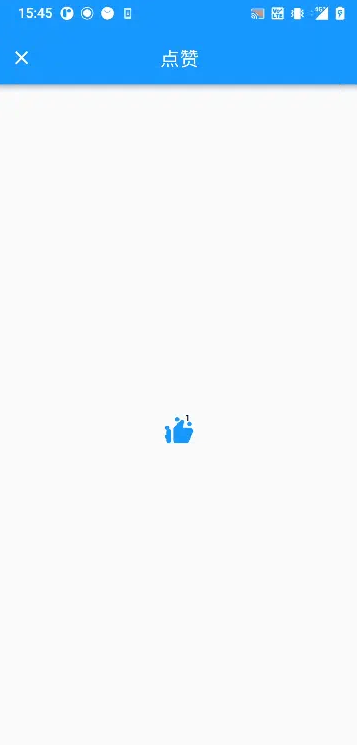
然后图标就变成了这样样子
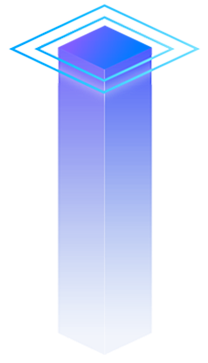
我们看到,掘金app点赞的过程中,周围还有一些小气泡的效果,这里提供一个思路,将这些气泡的坐标点放到一个圆的外环上面,通过动画改变圆的半径达到小圆点由内向外发散,发散的同时改变小圆点的大小,从而达到气泡的效果, 关键代码:
var r = size.width / 2 - 15; // 半径
var d = 4; // 偏移量 气泡的移动距离

// 绘制小圆点 一共4个 掘金也是4个 角度可以自由发挥 这里根据掘金app的发散角度定义的
canvas.drawpoints(
    ui.pointmode.points,
    [
      offset((r + d * animation2.value) * cos(pi - pi / 18 * 2),
          (r + d * animation2.value) * sin(pi - pi / 18 * 2)),
      offset((r + d * animation2.value) * cos(pi + pi / 18 * 2),
          (r + d * animation2.value) * sin(pi + pi / 18 * 2)),
      offset((r + d * animation2.value) * cos(pi * 1.5 - pi / 18),
          (r + d * animation2.value) * sin(pi * 1.5 - pi / 18)),
      offset((r + d * animation2.value) * cos(pi * 1.5 + pi / 18 * 5),
          (r + d * animation2.value) * sin(pi * 1.5 + pi / 18 * 5)),
    ],

    _paint
      ..strokewidth = 5
      ..color = colors.blue
      ..strokecap = strokecap.round);
得到现在的图形, 发散前
发散后
接下来继续我们来添加交互效果,添加动画,如果有看上一篇吃豆人,相信这里就很so easy了,首先创建两个动画类,控制小手和气泡,再创建两个变量,是否点赞和点赞数量,代码:
late animation<double> animation; // 赞
late animation<double> animation2; // 小圆点
valuenotifier<bool> iszan = valuenotifier(false); // 记录点赞状态 默认没点赞
valuenotifier<int> zannum = valuenotifier(0); // 记录点赞数量 默认0点赞
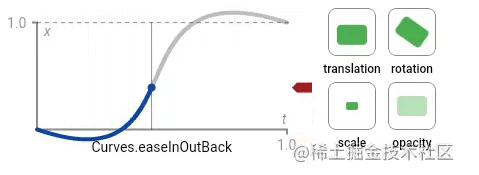
这里我们需要使用动画曲线curvedanimation这个类,这个类可以实现不同的0-1的运动曲线,根据掘金的点赞效果,比较符合这个曲线规则,快速放大,然后回归正常大小,这个类帮我们实现了很多好玩的运动曲线,有兴趣的小伙伴可以尝试下其他运动曲线。
小手运动曲线:
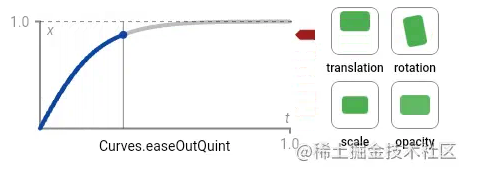
气泡运动曲线:
有了运动曲线之后,接下来我们只需将属性赋值给小手手和小圆点就好了
完整源码
封装一下,对外暴露大小,就是一个点赞组件了。
class zandemo extends statefulwidget {
  const zandemo({key? key}) : super(key: key);

  @override
  _zandemostate createstate() => _zandemostate();
}

class _zandemostate extends state<zandemo> with tickerproviderstatemixin {
  late animation<double> animation; // 赞
  late animation<double> animation2; // 小圆点
  valuenotifier<bool> iszan = valuenotifier(false); // 记录点赞状态 默认没点赞
  valuenotifier<int> zannum = valuenotifier(0); // 记录点赞数量 默认0点赞

  late animationcontroller _controller; // 控制器
  late animationcontroller _controller2; // 小圆点控制器
  late curvedanimation cure; // 动画运行的速度轨迹 速度的变化
  late curvedanimation cure2; // 动画运行的速度轨迹 速度的变化

  int time = 0;// 防止快速点两次赞导致取消赞

  @override
  void initstate() {
    super.initstate();
    _controller = animationcontroller(
        vsync: this, duration: const duration(milliseconds: 500)); //500ms
    _controller2 = animationcontroller(
        vsync: this, duration: const duration(milliseconds: 500)); //500ms

    cure = curvedanimation(parent: _controller, curve: curves.easeinoutback);
    cure2 = curvedanimation(parent: _controller2, curve: curves.easeoutquint);
    animation = tween(begin: 0.0, end: 1.0).animate(cure);
    animation2 = tween(begin: 0.0, end: 1.0).animate(_controller2);
  }

  @override
  widget build(buildcontext context) {
    return inkwell(
      child: center(
        child: custompaint(
          size: size(50, 50),
          painter: _zanpainter(animation, animation2, iszan, zannum,
              listenable.merge([animation, animation2, iszan, zannum])),
        ),
      ),
      ontap: () {
        if (!iszan.value && !_isdoubleclick()) {
          _controller.forward(from: 0);
          // 延迟300ms弹窗气泡
          timer(duration(milliseconds: 300), () {
            iszan.value = true;
            _controller2.forward(from: 0);
          });
          vibrate.feedback(feedbacktype.success);
          zannum.value++;
        } else if (iszan.value) {
          vibrate.feedback(feedbacktype.success);
          iszan.value = false;
          zannum.value--;
        }
      },
    );
  }

  bool _isdoubleclick() {
    if (time == 0) {
      time = datetime.now().microsecondssinceepoch;
      return false;
    } else {
      if (datetime.now().microsecondssinceepoch - time < 800 * 1000) {
        return true;
      } else {
        time = datetime.now().microsecondssinceepoch;
        return false;
      }
    }
  }
}

class _zanpainter extends custompainter {
  animation<double> animation;
  animation<double> animation2;
  valuenotifier<bool> iszan;
  valuenotifier<int> zannum;
  listenable listenable;

  _zanpainter(
      this.animation, this.animation2, this.iszan, this.zannum, this.listenable)
      : super(repaint: listenable);

  paint _paint = paint()..color = colors.blue;
  list<offset> points = [];

  @override
  void paint(canvas canvas, size size) {
    canvas.cliprect(offset.zero & size);
    canvas.translate(size.width / 2, size.height / 2);
    // 赞
    final icon =
        iszan.value ? icons.thumb_up_alt_rounded : icons.thumb_up_alt_outlined;
    // 通过textpainter可以获取图标的尺寸
    textpainter textpainter = textpainter(
        text: textspan(
            text: string.fromcharcode(icon.codepoint),
            style: textstyle(
                fontsize: animation.value < 0 ? 0 : animation.value * 30,
                fontfamily: icon.fontfamily,
                color: iszan.value ? colors.blue : colors.black)),
        textalign: textalign.center,
        textdirection: textdirection.ltr);
    textpainter.layout(); // 进行布局
    size size2 = textpainter.size; // 尺寸必须在布局后获取
    //将图标偏移到画布中央
    textpainter.paint(canvas, offset(-size2.width / 2, -size2.height / 2));

    var r = size.width / 2 - 15; // 半径
    var d = 4; // 偏移量

    canvas.drawpoints(
        ui.pointmode.points,
        [
          offset((r + d * animation2.value) * cos(pi - pi / 18 * 2),
              (r + d * animation2.value) * sin(pi - pi / 18 * 2)),
          offset((r + d * animation2.value) * cos(pi + pi / 18 * 2),
              (r + d * animation2.value) * sin(pi + pi / 18 * 2)),
          offset((r + d * animation2.value) * cos(pi * 1.5 - pi / 18 * 1),
              (r + d * animation2.value) * sin(pi * 1.5 - pi / 18 * 1)),
          offset((r + d * animation2.value) * cos(pi * 1.5 + pi / 18 * 5),
              (r + d * animation2.value) * sin(pi * 1.5 + pi / 18 * 5)),
        ],
        _paint
          ..strokewidth = animation2.value < 1 ? 5 * animation2.value : 0
          ..color = colors.blue
          ..strokecap = strokecap.round);
    textpainter textpainter2 = textpainter(
        text: textspan(
            text: zannum.value == 0 ? "点赞" : zannum.value.tostring(),
            style: textstyle(
                fontsize: 9, fontweight: fontweight.w500, color: colors.black)),
        textalign: textalign.center,
        textdirection: textdirection.ltr);
    textpainter2.layout(); // 进行布局
    // 向右上进行偏移在小手上面
    textpainter2.paint(canvas, offset(size.width / 9, -size.height / 2 + 5));
  }

  @override
  bool shouldrepaint(covariant _zanpainter olddelegate) {
    return olddelegate.listenable != listenable;
  }
}
到这里发现是不是少了点什么,不错,还少了震动的效果,这里我们引入flutter_vibrate: ^1.3.0这个插件,这个插件是用来管理设备震动效果的,andoroid端记得加入震动权限
<uses-permission android:name="android.permission.vibrate"/>使用方法也很简单,这个插件封装了一些常见的提示震动,比如操作成功、操作警告、操作失败等,其实就是震动时间的长短,这里我们就在点赞时候调用vibrate.feedback(feedbacktype.success);有一个点击成功的震动就好了。
最后来看下最终效果图吧:
是不是和掘金app的效果一样,不信你点个赞看看~~
关于“Android如何实现点赞加一的功能效果”的内容就介绍到这,感谢各位的阅读,相信大家对Android如何实现点赞加一的功能效果已经有了进一步的了解。大家如果还想学习更多知识,欢迎关注群英网络,小编将为大家输出更多高质量的实用文章!
免责声明:本站发布的内容(图片、视频和文字)以原创、转载和分享为主,文章观点不代表本网站立场,如果涉及侵权请联系站长邮箱:mmqy2019@163.com进行举报,并提供相关证据,查实之后,将立刻删除涉嫌侵权内容。

2022-12-14 11:21:38
2022-08-19 17:53:01
2022-08-19 17:51:59
2022-01-24 19:23:44
2022-02-25 17:19:26
2022-01-04 18:53:44
2022-01-26 18:39:38
2021-11-20 17:46:01
2022-01-18 18:00:09
2022-01-13 18:58:11
2022-01-24 19:23:57
2021-11-22 17:53:55
2021-11-20 17:45:40